Browsing Tag

vegan

New York City – Part 3 & Recipe

August 29, 2012

katie-in-new-york-city-part-three

A great trip lingers with you long after you return home. A successful holiday is one where memories are unpacked long after the suitcase is emptied and the laundry is done. It’s been more than a few weeks since I came back from New York City and I’m starting to realize that my trip reorganized a few things in my life while I was away: I’ve got a travel bug to foster and a whole new set of cravings to grapple with.

The city has instilled in me more purpose and inspiration in the every day, which are ultimately great things. NYC is where trends are set, tastemakers abound, and culture flourishes. I find inspiration comes from noticing what’s around…the sites, sounds and even smells. From the graffiti on the street to wandering local markets –  it’s a wake up call for my senses. I take this newly refreshed outlook with me to the kitchen and other areas of my life in the hopes I can inspire others to lead full, happy lives.

Since my return to Ireland, my imagination whirls over gems of stories of the NYC food world. I ate pretty amazingly on this trip. We tried the brand new raw eatery of Gingersnap’s Organic, had fresh baked treats from Life Thyme Natural Market, had a picnic salad in Central Park courtesy of Whole Foods, ate exotic cuisine (Thai, Japanese, Pakistani), purshaced a quinoa falafel while browsing Smorgasburg Flea Food Market in Brooklyn, drank a delicious smoothie on the boardwalk from Rippers and devoured a homemade meal while sipping on cocktails on my sister’s rooftop oasis. In sum: we ate great food.

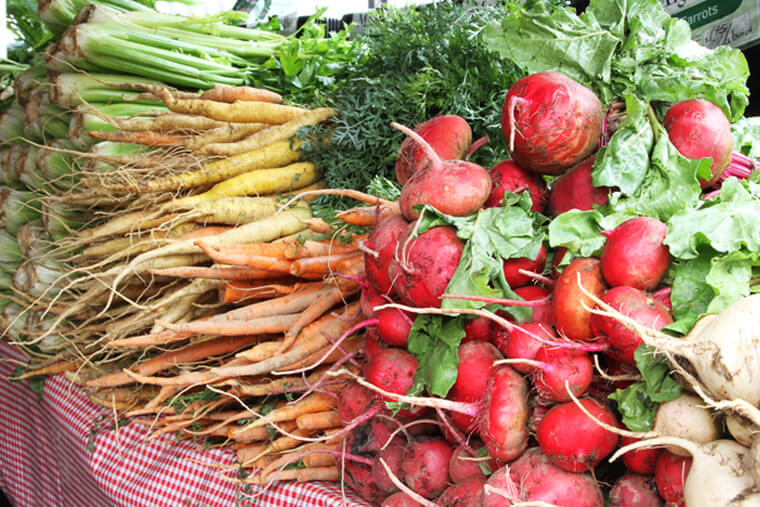
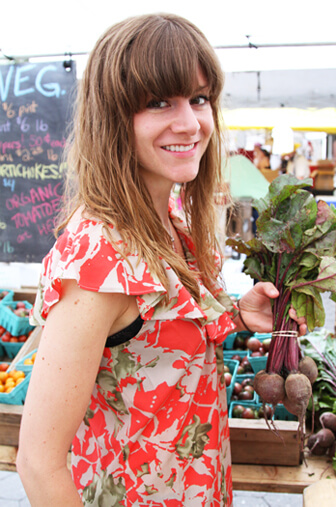
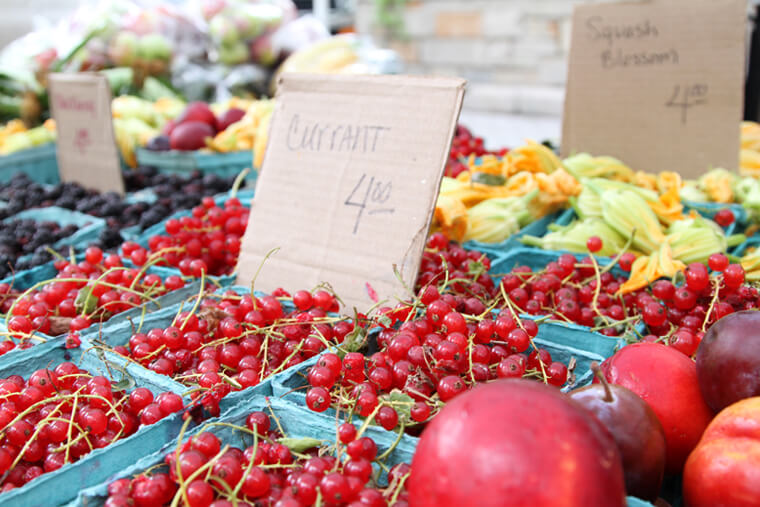
One of my favorite things to do at this time of year to find inspiration is to visit the local farmer’s markets – especially the ones that are so abundant in New York City. From the rows of fresh fruit and produce to bundles of cut flowers, it’s as much a treat just to visit as the fresh produce I take home with me is to eat. My last day in New York was spent with my sister wandering the Union Square Greenmarket. Hundreds of regional farmers, fishermen, and bakers descend upon Union Square to sell their products. The atmosphere on a market day is electric with bustling crowds and farmed culinary treasures as far as the eye can see. After a thorough perusal of the goods up for sale, I settled on the ripest mango, fresh berries, limes and the most beautiful flower arrangement.

katie-norris-new-york-city

farmers-market-beets


farmers-market-currant

union-square-farmers-market

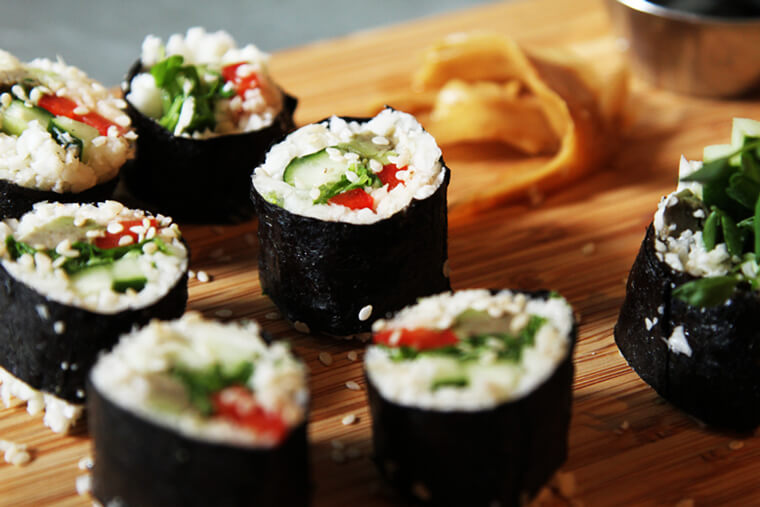
Those memories have been just the reason why I’ve been spending so much time in my kitchen trying to recreate some of my culinary experiences. One of my favorite things I tried while on my travels were the Nori Rolls from Gingersnap’s Organic in the East Village. My sister and I popped in for a quick lunch and quite enjoyed the nori rolls, which were light but definitely flavorful and actually very reminiscent of veggie sushi. The dish features avocado, bell pepper, and sprouts, all tucked inside “rice” made from finely chopped cauliflower. Soy, pickled ginger, and wasabi stand guard to add additional flavor. I’ve attempted making this dish at home since returning from NYC. Though my version was almost nearly as delicious, my rolling skills could use some practice. It is a very simple recipe if you can master the art of rolling the nori. Why not give it a go the next time you’re in the mood for a raw meal?

raw-cauliflower-sushi-rice

Raw Cauliflower “Sushi Rice” 

Makes approx. 3 cups

Ingredients:

  • 1 head of cauliflower
  • 1 tsp. minced ginger
  • 1 clove garlic
  • 1 tsp. nama shoyu, or to taste
  • Pinch sea salt
  • a little squeeze of lemon juice

Directions:

  1. Place all of the ingredients in a food processor and pulse until the cauliflower is ground up small. Be careful not to over-process, stop when it looks like rice.

Nori Rolls

Makes two large rolls which can be cut into 8 pieces each

Ingredients:

  • 1 bamboo sushi mat
  • 2 nori sheets (if you want to keep it 100% raw make sure you get un-toasted)
  • 2 cups cauliflower “rice”
  • 1/2 large avocado or 1 small, sliced length ways
  • choice of vegetables, finely sliced and/or grated (I used sliced carrot, cucumber and grated beetroot)
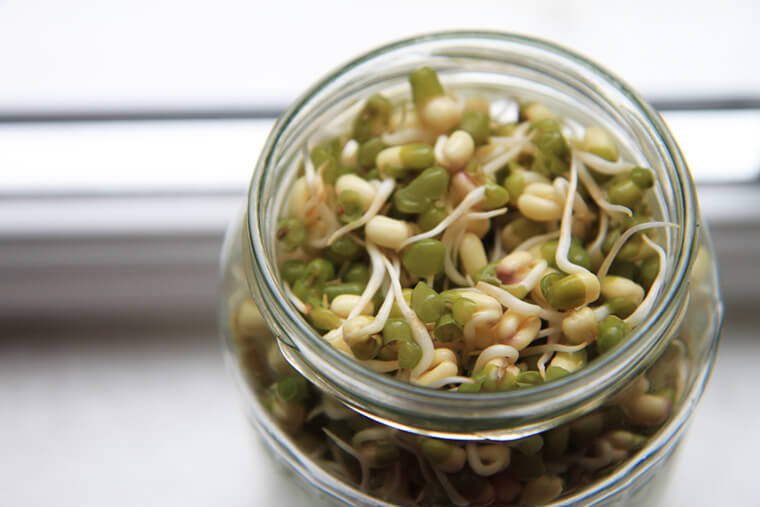
  • sprouts of choice
  • sesame seeds for garnishing (optional)
  • low sodium gluten-free tamari or nam shoyu sauce, to serve (optional)

Directions:

  1. Prepare your work station with all ingredients ready to go into the nori rolls.
  2. Lie the nori sheet on your bamboo mat, with the smoother side face down and spread 1 cup of “rice” evenly over a section of it.
  3. Press the rice down firmly and top with veggies, avocado and sprouts in layers down the center.
  4. Take the side of the mat closest to you with only the small bit of seaweed exposed and gently roll over the mound of filling, squeezing lightly. Then continue to roll up tightly until you meet the other edge of the nori. Wet a thin strip at the far end to seal the roll together.
  5. Take a sharp knife with a serrated blade and carefully slice the roll into 8 pieces. Sprinkle with sesame seeds and enjoy with tamari or shoyu dipping sauce.


Strawberry Rhubarb Pie

August 23, 2012

strawberry-rhubarb-pie

Rhubarb is one of the season’s sweetest gifts. These crisp, tart stalks that look like ruby-red celery start appearing in the farmer’s market in early spring. They get snapped up in a hurry by eager bakers, but to the uninitiated they are a bit of a mystery. That’s because rhubarb looks so much like a vegetable — it is in fact a vegetable– and is so lip-puckering sour that someone who’s never tried it before can’t help but wonder how it would fit in with sweets, where it is most often used. Well, I have an easy solution to make you a believer: put some rhubarb where your mouth is. But first, bake it into a pie, like this one I have for you today.

Strawberry rhubarb pie is adored by many, in spite of or perhaps because of its old-timey charm. At their best, cooked strawberries taste like cotton candy and rhubarb is the perfect almost citrusy-sour contrast. There’s no twist here, nothing fancy whatsoever. This recipe is simple, just the way I like it. I want you to have access to the most balanced approach to a strawberry rhubarb pie. This is a recipe to keep in your back pocket, taped to the inside of your pantry cabinet, or simply seared into your mind.

Vegan & Gluten-Free Pie Crust

Makes 1 approximately 9″ pie crust

Ingredients:

  • 1 1/2 cups rice flour (brown or white)
  • 1/4 tsp. baking powder
  • 1 Tbsp. agave nectar, or sweetener of choice
  • pinch of salt
  • 1 Tbsp. ground flaxseed + 3 Tbsp. water
  • 1/4 cup dairy-free buttery spread, melted
  • cold water

Directions:

  1. Stir together the flaxseed mixture and melted dairy-free buttery spread.
  2. Sift together the dry ingredients over the wet ingredients. Stir the dough together – it will be soft and crumbly. Add enough cold water so that the dough can be pressed together and holds.
  3. Lightly oil the pie pan.
  4. Press the dough into the pie pan and up the sides as far as possible being sure to keep the crust an even thickness. I use a flat bottomed measuring cup to help make the crust even and flat.

pie-strawberry-rhubarb

Strawberry-Rhubarb Filling

Ingredients:

  • 3 cups thinly sliced rhubarb
  • 2 cups rough chopped strawberries
  • 1/2 cup agave nectar, or sweetener of choice
  • 1/4 cup tapioca or cornstarch (gluten-free)
  • 1 Tbsp. fresh lemon juice
  • 1 tsp. lemon zest

Directions:

  1. Preheat oven to 425° F (218° C).
  2. Combine all of the filling ingredients together in a large mixing bowl.
  3. Add filling to the prepared pie shell. Cover loosely with tin foil and poke a few holes in the foil to let steam escape.
  4. Bake for about 20 minutes at 425° F (218° C). Lower heat to 350° F (177° C), and remove the tin foil. Bake for an additional 30 to 35 minutes, filling should be bubbling and the crust should be golden.
  5. Place on a cooling rack and let cool for about 30 minutes before serving.


(Photo Credit: my sister, Jenny Norris – jjnorris.com)

Gourmet Popsicles

August 11, 2012

Gourmet popsicles are making their way as the newest food rage. You can see evidence of that in some way in just about every food publication you pick up, on any food show on television and all over the internet. There is hardly a specialty food market, farmer’s market or food truck anywhere that does not have some representation of these handcrafted, gourmet frozen confections. And why not? They are fun, creative, and in most cases, a healthy option to some of the overly sweetened, processed frozen treats that have been making the scene for years.

Ever since we browsed the People’s Pops stall at the Brooklyn Flea Market, I starting gathering a little inspiration for my own homemade artisan popsicles. We purchased fruit from farmer’s markets and condensed it into the form of a simple and nostalgic summertime staple. With temperatures reaching  over 90 degrees while visiting NYC, the popsicles we made at my sister’s apartment were the perfect antidote to the heat — if only for a few minutes.

Ginger Tea Cherry Popsicles

Ingredients:

  • 1.5 cups hot water
  • 2 ginger tea bags
  • 1 Tbsp. agave nectar, or sweetener of choice
  • a pinch of salt
  • 1 cup of pitted cherries (I used sour cherries)
  • 1 Tbsp. lemon juice

Directions:

  1. Steep ginger tea bags in hot water for 5 minutes.
  2. Discard tea bags and stir in agave nectar. Set aside to cool.
  3. Add lemon juice and salt. Stir to combine.
  4. Pour the ginger tea concoction into popsicle trays and add cherries. Freeze completely (4-5 hours).
  5. To un-mold, place popsicle trays under running hot water for a few seconds.

Almond Pear Popsicles

Ingredients:

  • 1.5 cups almond milk
  • 1 pear, sliced
  • ½ tsp. almond extract
  • 1 Tbsp. agave nectar, or sweetener of choice
  • Pinch of cinnamon

Directions:

  1. Place almond milk into a small bowl. Stir in almond extract, agave nectar and cinnamon.
  2. Pour mixture into popsicle trays and add pear slices. Freeze until set (4-5 hours).
  3. To un-mold, place popsicle trays under running hot water for a few seconds.

Enjoy!

(Photo Credit: my sister, Jenny Norris – jjnorris.com)

Sprouting 101

July 31, 2012
sprouting-101

When we think of sprouting, most people think of alfalfa sprouts. What most people don’t realize is that you can sprout any truly raw seed, nut and/or grain or legume. You don’t have to be a health nut (no pun intended) or a raw foodist to be a sprouter. I began my adventures in sprouting this spring and it has turned into a real obsession in our house. I’ve sprouted chickpeas, lentils, mung beans and alfalfa so far. We can’t get enough of them.

Sprouts are a miracle food. Sprouts can be grown any time of the year, without soil, maturing in three to five days even without sunshine and rival almost any food in nutrition value. Sprouts will grow year-round in any climate with very little effort to provide vital, organic, locally grown produce (as local as your own kitchen!).

Sprouts are seeds, nuts, beans, or gains that have been germinated with water. This initiates the growth process. Sprouting transforms seeds from a dry, dormant storehouse of nutrition into a wealth of bioavailable vitamins, minerals, and protein that is rich in enzymes for easy digestion. Sprouts are abundant in all essential amino acids (the building blocks of protein), vitamins, minerals, chlorophyll, and enzymes. Sprouts are perhaps the most vital of all fresh foods. Sprouting actually increases the nutritional value of foods. A seed contains more concentrated nutrition that the plant on which it grew. As a plant matures, energy is collected and focused into producing a seed for reproduction. The seed is the storehouse of essential energy. When the seed is germinated, the potential energy is awakened and the complex concentration of energy is broken down into a simpler, more available state. which is easier to digest.

sprout-dish

Sprouts are nutritional powerhouses. Any means of incorporating and munching sprouts on a regular basis is a champion of choices. They can be put into salads, breads, used in soup… or eatten as is.

Equipment for sprouting:

  • Glass jar with a wide mouth
  • 1 piece of screen or mesh
  • 1 rubber band (to secure the screen or mesh)
  • Fresh water
  • Seed, nut, bean, or grain of choice

How to make sprouts

Use one part seed to at least three parts water. Soak in a wide-mouth jar. All measurements below yield one quart of ready sprouts. Half-gallon or larger jars are more convenient.

Seed                                      Soak time            Days to sprout

2 Tbsp. alfalfa                      6 hours                      5-6 days

½ cup lentils                        8 hours                     3 days

½ cup mung beans             8 hours                     3-5 days

1 cup wheat or rye               12 hours                   3 days

1 cup garbanzo beans         12 hours                   3-5 days

2 cups sunflower seeds      12 hours                   2 days

sprouting-progress

Directions:

  1. Cover the mouth of the jar with a plastic or stainless steel sprouting screen or cheesecloth, which is tied on or secured with a rubber band (I use a sprouting jar). After soaking seeds, drain well and keep in a warm dark place.
  2. Rinse twice a day, ideally morning and evening. Keep jar tilted mouth down for better drainage.
  3. After a few days you will notice nice little sprouts appearing. Once ready, they can be refrigerated. They keep up to one week in a plastic bag or covered glass jar.