Spring has definitely started to reveal it’s pretty face in my part of the world. The beginning of a new season always sparks enthusiasm for new habits, fresh goals and great ideas. If it takes the arrival of a new season to inspire you to do a detox, then let’s do it! But if you have never done a cleanse or detox before it can be overwhelming. On the other hand, if you have and you didn’t get the results you expected, this post might give you some insight and inspiration to give it a shot and succeed in a way that could truly change your life forever.
Whether you want to commit to a healthier eating regimen or simply treat your body to some rest, my three-day detox plan is a delicious way to do it. I’ve prepared a streamlined menu of big batch meals so that you can front load all of the work. By eating clean you will help your body focus on detoxing, rather than on breaking down complex foods. According to many ancient health philosophies such as traditional Chinese Medicine and Ayurveda, the spring season rules the liver, an organ that’s essential for overall wellness, but especially digestion.
These dishes give your digestive system a rest from processed foods and allergens like dairy and gluten. Loading up on the season’s fibrous fruits and vegetables helps remove toxins. A regular cleanse will support a desire to maintain a healthier, much lower level of toxins and move them out on a constant basis in order to avoid disease. Since spring is an optimal time to refresh your energy and start something new, it’s also a great time to simplify your eating and choose foods that will support your overall health.
Basic Outline of the Detox
A plant-based, alkalizing lifestyle, as I embrace with this blog, will naturally flush toxins to detox the body and allow it to return to it’s ideal body weight.
- Alkalizing the body with chlorophyll rich green veggies naturally buffers the acids from an acidic lifestyle and assists in flushing toxins.
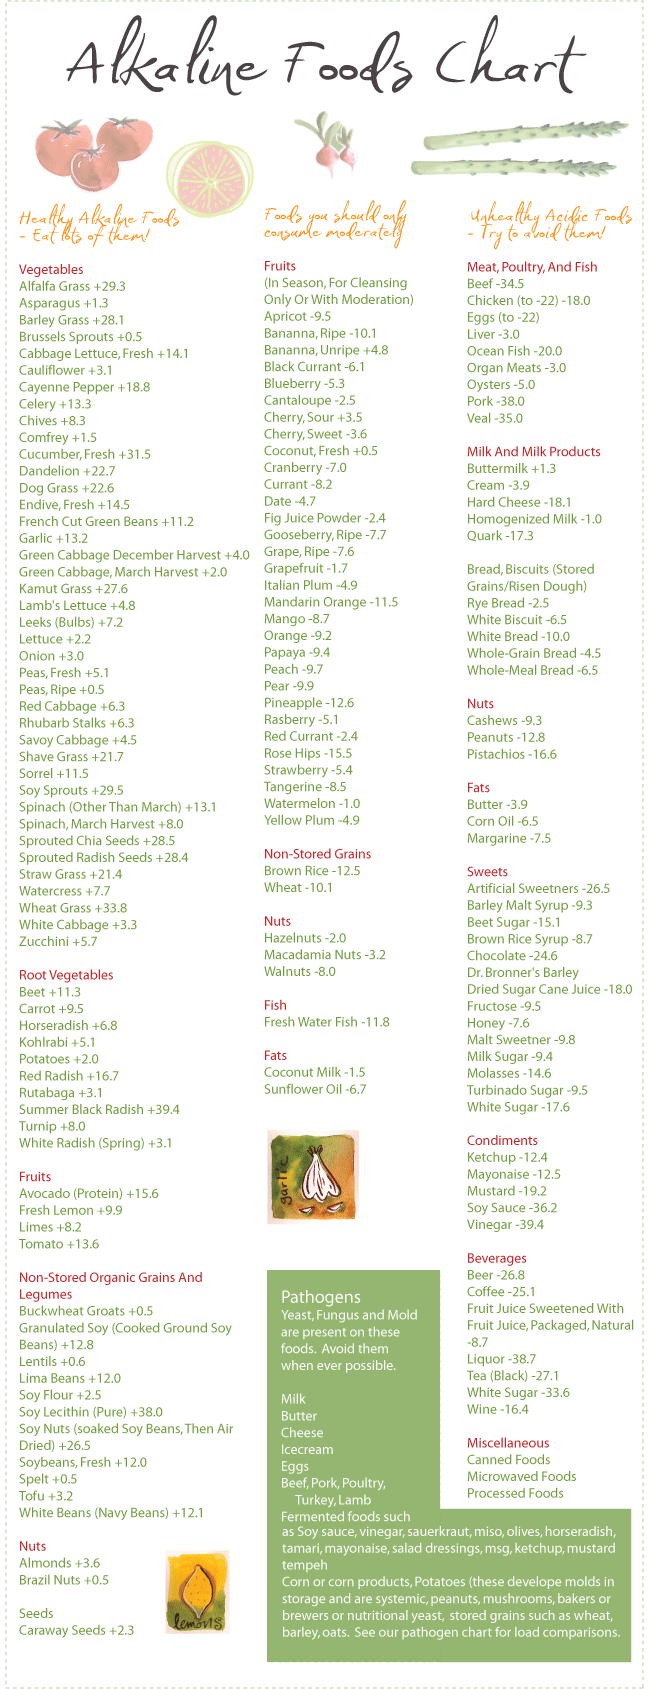
- A balance of 80% veggies to 20% healthy acidic whole foods – see alkaline chart here – in an everyday way to be constantly detoxing your body. Choose organic whenever possible, prepare meals that are colorful and juice daily if you can.
- Consume good quality water, 2-3 liters per day to really flush those toxins and minimize the detox symptoms one might experience. If you are quite “toxic” and have never cleansed I recommend you go easy and do a slower version by leaning into a clean detoxing alkaline lifestyle. Start adding as much veggies and green juice as you can handle every single day and continually increase to the 80/20 ratio.
- I highly recommend this juice cleanse to flush your system and jump start your detoxing alkaline lifestyle. Take a thorough read through the post and see if it’s for you. It changed my life for good! If the body can really detox and there are no more or considerably less toxins coming in, magic happens!
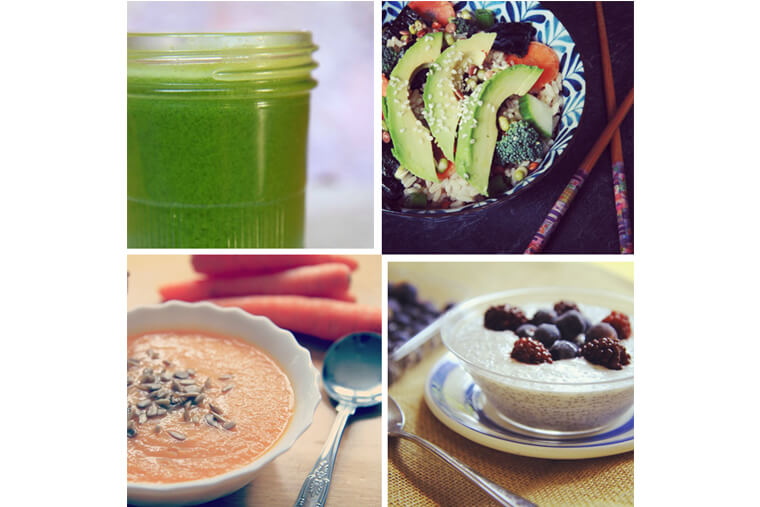
DAY 1, 2 & 3
- Upon rising – Ginger Lemon Detox (recipe below)
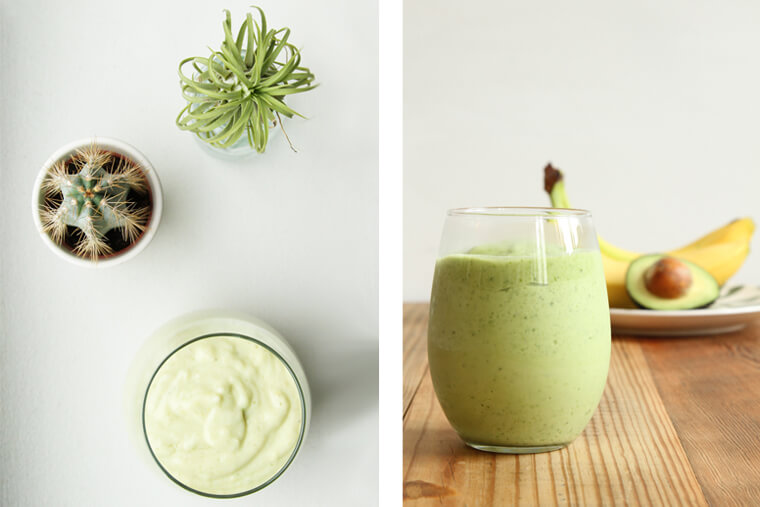
- Breakfast – Green Lemonade or Green Smoothie
- Mid Morning Snack – Apple with Tahini (recipe below)
- Lunch – Veggie Sushi Bowl or Simple Quinoa Salad (cook 1.5 cups of either brown rice or quinoa)
- Afternoon Snack – Activated Almonds (recipe below)
- Dinner – Carrot Ginger Soup
- Dessert – Chia Pudding
- After Dinner – Calming Chamomile Tea (recipe below)
RECIPES
Ginger Lemon Detox
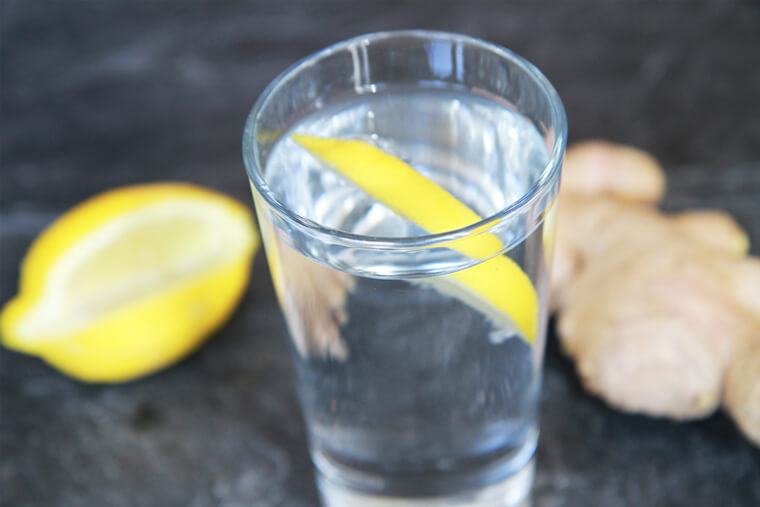
Ingredients:
- 12 ounces spring or filtered water, at room temperature
- juice of 1/2 lemon
- 1/2-inch knob of ginger root
Directions:
- Add the lemon juice and ginger root to the glass of water. Enjoy at room temperature upon rising for an amazing start to the day!
Apple with Tahini
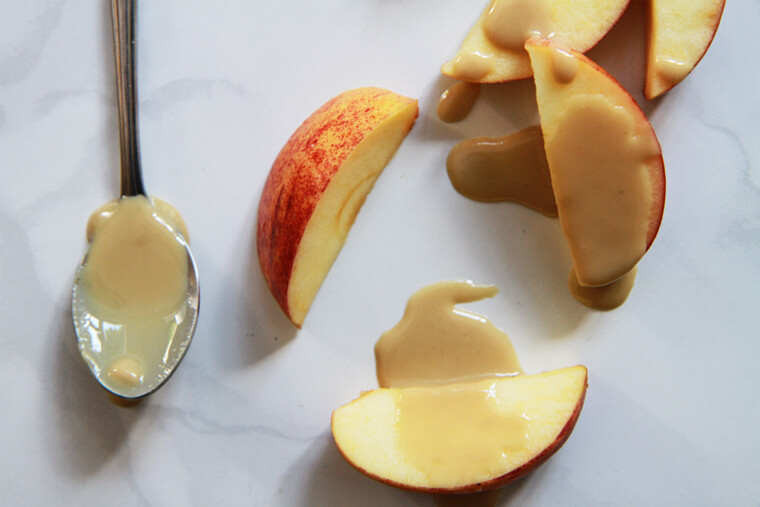
Serves 1
Ingredients:
- 1 tablespoon tahini
- 1 sweet apple (such as Honeycrisp or Pink Lady), cored and sliced
Directions:
- Drizzle tahini over apple.
Activated Nuts and Seeds
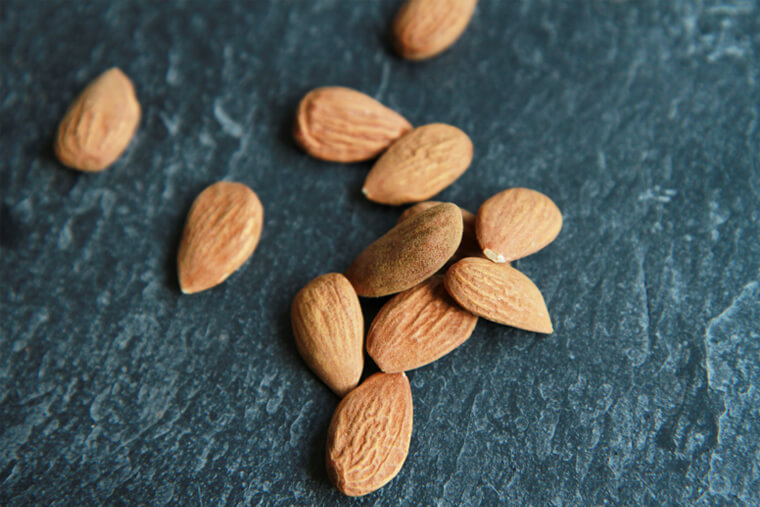
Serves 3
Ingredients:
- 3 handfuls raw almonds (you can use almonds or a mixture of macadamia nuts, pecans, hazelnuts, Brazil nuts, pine nuts, pumpkin seeds, or sunflower seeds if desired)
- filtered or spring water, at room temperature
- 1 teaspoon sea salt
Directions:
- In a large bowl, place all of the ingredients with enough water to cover fully. Leave at room temperature for at least 4 hours, or overnight. Strain and store the nuts in a covered container in the fridge.
Calming Chamomile Tea
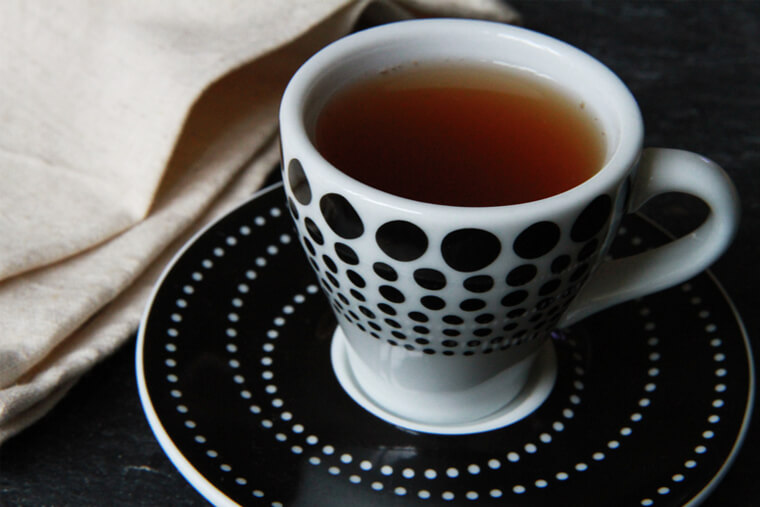
Serves 1
- 1 cup spring or filtered water
- 1 chamomile tea bag or 1 tablespoon dried chamomile flowers
Directions:
- Bring the water to a boil and pour into a teacup or mug. Add the tea bag or, if using loose flowers, use a teapot and a strainer. Steep for 3 to 5 minutes, then enjoy.
Optionally, try other herbal detox teas such as nettle, dandelion root or licorice root.

After completing such a regimen, you will develop a pattern of taking care of yourself that will stick if you are persistent right now. You’ll also begin to notice some pretty amazing things. Pay attention to your body and really try to feel and notice the way your energy changes. Do you feel more vibrant, more energetic? Are you sleeping better? Is your skin glowing? Your skin tells all- your depth of color and brightness and clarity show how healthy you are! It will be contagious and maybe your friends will start on a healthier journey with you!
Are you excited about a new direction for your health? I hope you are inspired by the messages here. I’m about to start a spring cleaning so I’d love to have you join me May 1st-3rd! As always, please don’t hesitate to drop me a line with any questions or comments you might have. Also be sure to sign up for my newsletter where I share exclusive content, recipes and fun tips!
Sending you vibrant health and strength to make the best choices possible for your body so you can thrive this year and for many more to come!
*Disclaimer: The content on this site is not written with intentions to substitute professional medical advice, diagnosis or treatments. Our content is for information purposes only and should not be used to diagnose or treat health issues of any sort. We cannot be held liable for any ill effects caused by following these instructions or this material. Always consult with a medical professional when adjusting your diet.

